Installation
Miabi runs as four containers: the control plane (API + embedded web console), PostgreSQL, Redis, and Goma Gateway (routing + TLS). You can have Docker Compose create them, or let Miabi create them itself — see the two modes.
Requirements
- A Linux host with a public IP and a domain pointing at it.
- Docker Engine 25+ (the installer adds Docker if missing). 25.0 is the minimum Miabi
supports — see Supported Docker Engine versions.
The Compose v2 plugin is needed only if you take the
manual Compose path; the installer script drives the
Docker API directly and never shells out to
docker compose. - Ports 80 and 443 open — Goma terminates TLS and serves ACME challenges.
A small VPS (2 vCPU / 2 GB RAM) is enough to get started. Databases and apps you deploy will consume additional resources on top of the control plane.
Miabi does not need a clean, dedicated host. It runs alongside whatever Docker workloads are already on the machine — the control plane only manages the containers, volumes, and networks it creates (plus any you explicitly adopt). If you already have containers running, you can import them into Miabi and take over their lifecycle without downtime — they keep running and simply start showing up in the console. And you don't have to use the installer script: the manual Docker Compose path gives you the exact same stack.
Supported Docker Engine versions
Miabi requires Docker Engine 25.0 or newer on the control-plane host and on every node. 25.0 is the floor of the versions Miabi tests — its CI runs the engine integration suite on Docker 25, 26, 27, 28 and 29.
How Miabi runs
Miabi is four containers: the control plane (API + embedded web console), PostgreSQL, Redis, and Goma Gateway (routing + TLS).
The installer builds them itself, straight against the Docker API — it does not use Docker
Compose. Every container is labelled io.miabi.managed-by=miabi, which is what lets Miabi update
its own components, including its own container, and roll back a bad image.
Compose owns what Compose created. A container Miabi recreated out-of-band would be silently
reverted by the next docker compose up -d — so a Compose-managed Miabi could never truthfully
update itself. Changing the owner is what makes miabi upgrade possible.
Compose is still fully supported if you want to drive it yourself: see Manual install with Docker Compose. The installer simply no longer does it for you.
One-line install (recommended)
curl -fsSL https://get.miabi.io | sudo MIABI_DOMAIN=miabi.example.com \
  MIABI_ADMIN_EMAIL=you@example.com bash
It installs Docker if missing, installs the miabi CLI to /usr/local/bin, then runs
miabi setup — which creates the two networks, the volumes and the four containers, writes
/etc/miabi/miabi.yaml, and prints the admin password.
That one address becomes both your admin login and your Let's Encrypt contact — see One email is enough.
Answering prompts over a pipe is unreliable, so pass MIABI_DOMAIN and MIABI_ADMIN_EMAIL as above
rather than letting it ask.
The script installs the newest stable release, which it reads from
versions.miabi.io along with the gateway and CI runner versions that
release was tested with, and the newest stable miabi CLI (which manages any stack version). To pin a release, set MIABI_VERSION=v1.4.0 (and GOMA_VERSION with
it, for the gateway that release was tested with). A GOMA_VERSION, RUNNER_VERSION or
MIABI_CLI_VERSION you set yourself always wins, and with all four set the script makes no lookup.
If versions.miabi.io can't be reached, the install stops rather than falling back to :latest
images.
The installer refuses to run on a host that already runs Miabi under Compose, because the two do
not share volumes (miabi_pgdata vs mb-platform-pgdata) — installing the stack there would create
an empty database beside your real one.
To stay on Compose: cd /opt/miabi && docker compose pull && docker compose up -d.
To migrate: back up, docker compose down, re-run with MIABI_FORCE_STACK=1, restore the backup.
What the installer leaves behind
/usr/local/bin/miabi — the Miabi CLI. It is one tool for two jobs: the panel's
API client you already knew, and the manager of the stack on this host.
sudo miabi stack status                # what is running, and its health
sudo miabi stack restart               # restart the stack, or one component
sudo miabi upgrade                     # roll forward to a newer release (rolls back on failure)
sudo miabi stack uninstall             # keeps your data; add --volumes to destroy it
setup and upgrade sit at the top level because they are the host's lifecycle; everything else
is namespaced under stack. All of them need root — they write /etc/miabi and talk to the Docker
socket — and they only work on the machine they run on.
The miabi-stack wrapper earlier releases installed is gone. Replace it in any runbook or cron
job: miabi-stack install → miabi setup, miabi-stack update → miabi upgrade, everything else
→ miabi stack <verb>. Re-running the installer removes it.
Your manifest also moves. Miabi reads /etc/miabi/miabi.yaml now; if yours is still at
/etc/miabi/stack.yaml the CLI detects it and tells you to run sudo miabi stack migrate-config,
which renames it.
Install options
| Env var | Flag | Meaning |
|---|---|---|
MIABI_DOMAIN | --domain | Panel hostname. Required. |
MIABI_ACME_EMAIL | --acme-email | Let's Encrypt contact. |
MIABI_ADMIN_EMAIL | --admin-email | First admin's login. |
GOMA_VERSION | --gateway-image | Goma Gateway version (default: tested with the Miabi release). |
RUNNER_VERSION | --runner-image | Runner version shown in the CI runner enrollment command (default: tested with the Miabi release). |
MIABI_CONTROL_URL | --control-url | URL remote nodes and agents dial back on. Defaults to the panel's own URL. |
MIABI_REGISTRY_ENABLED | --registry | Enable the built-in registry. |
MIABI_REGISTRY_HOST | --registry-host | Its hostname (default registry.<domain>). Needs its own DNS record — it gets its own certificate. |
| — | --goma-config | Gateway config file, relative to the manifest's directory (default goma.yml). |
MIABI_SUBNET | --subnet | CIDR for the shared app network (default 10.63.0.0/16). |
MIABI_INTERNAL_SUBNET | --internal-subnet | CIDR for the platform's private network — control plane, database, cache (default 10.62.0.0/16). |
MIABI_NO_HOST_PROC | --no-host-proc | Do not bind the host's /proc. See below. |
MIABI_CONFIG_FILE | --file | Where the manifest lives (default /etc/miabi/miabi.yaml). MIABI_ETC sets its directory. |
MIABI_FORCE_STACK | — | Install even though a Compose stack is present. See the caution above. |
MIABI_CLI_VERSION | — | Which miabi CLI release to install (default: the newest stable). |
MIABI_CLI_BASE_URL | — | Fetch the CLI from a mirror instead of the GitHub release — an internal artifact store for an air-gapped install. Must serve the same archive and checksums.txt names. |
MIABI_RELEASE_API | — | A mirror for the latest-version lookup miabi setup/upgrade make when neither --version nor --image is given (by default versions.miabi.io). It must serve GitHub's releases JSON; or pass --version to skip the lookup. |
acme_email (the Let's Encrypt contact) and admin_email (the platform admin's login) fall back
to each other. Give either one and it is used for both. Only if you give neither does Miabi guess
admin@<domain>.
The manifest
Stack mode keeps its desired state in /etc/miabi/miabi.yaml, mode 0600. It has to be a file on
the host and not a database table, because PostgreSQL is itself part of the stack — the installer
cannot read the database to learn how to start the database.
apiVersion: install.miabi.io/v1
kind: ControlPlane
metadata:
  name: miabi
spec:
  domain: miabi.example.com
  endpoints:
    web: https://miabi.example.com
    control: https://miabi.example.com   # where nodes and agents dial back
  acme:
    email: you@example.com               # Let's Encrypt contact

  server:
    image: miabi/miabi:1.10.0
    hostProc: true
    env:
      TZ: UTC
      MIABI_LOG_LEVEL: info
  database:
    image: postgres:17-alpine
  cache:
    image: redis:7-alpine
  gateway:
    image: jkaninda/goma-gateway:0.15.1
    config: goma.yml                     # bind-mounted into Goma, read-only
    env:
      GOMA_LOG_LEVEL: info               # debug | trace | info | warn | error | off
      GOMA_ANALYTICS_ENABLED: "true"     # emit the Workspace Analytics event stream

  registry:
    enabled: true
    host: registry.miabi.example.com

  admin:
    email: you@example.com               # your panel login

  secrets:                               # generated on first install; this is the only copy
    adminPassword: …                     # printed once, at the end of the install
    dbPassword: …
    redisPassword: …
    jwtSecret: …
    encryptionKey: …
    gomaConfigEncryptionKey: …           # encrypts gateway config; safe to rotate

  networking:
    proxy:    { name: miabi,          subnet: 10.63.0.0/16 }   # add ipv6: true for dual-stack
    internal: { name: miabi-internal, subnet: 10.62.0.0/16 }
Fields marked written by Miabi — spec.gateway.configSha and spec.server.dockerGid — are
derived state. configSha records the digest of the default gateway config Miabi last wrote, which
is what keeps a goma.yml you have customised from being overwritten; editing it by hand is how that
protection is lost.
Edit it and re-run sudo miabi setup — the converge is idempotent, so only what actually changed
is recreated. For environment variables there is no need to edit by hand:
sudo miabi stack env set MIABI_SMTP_HOST=smtp.example.com writes the value and shows what changes;
sudo miabi stack apply then recreates only the components that changed.
The manifest used to be a flat file starting version: 1. Both shapes load, and miabi setup writes
back whichever it read — it never converts a file underneath you. miabi upgrade does the
conversion, keeping the original as /etc/miabi/miabi.yaml.bak. Keep that copy: a converted file
cannot be read by an older CLI, so rolling the CLI back means restoring it.
stack.yamlThe manifest was /etc/miabi/stack.yaml before this release, which collided with the stack.yaml
name used for declarative manifests. The old path is no longer
read, but it is detected: point a command at a host that still has one and it says so, and
sudo miabi stack migrate-config renames it.
Every tag above is a fixed version, and that is the point: miabi setup on two hosts a month apart
should build the same stack. A floating tag (latest, edge, main, …) warns, because it
breaks the rollout in two ways — a failed upgrade cannot roll back (there is no distinct previous
image to return to), and drift against it cannot be detected, so the next upgrade reports "already
at" and does nothing. Use miabi upgrade --version 1.8.0 instead.
It holds the database password, the JWT secret and the encryption key, and it is the only copy. Without it you cannot decrypt the secrets Miabi has stored, and a fresh install onto the existing data volume will refuse to run: PostgreSQL keeps the password its data directory was created with, so a newly generated one can never open it.
The gateway config
goma.yml sits beside miabi.yaml and is bind-mounted read-only into the gateway — the same
shape as the Compose install, so you edit one file on the host and restart.
Miabi writes the default on first install and records its digest. After that:
- you never touched it → a newer release's default replaces it, so you keep getting upstream fixes;
- you edited it → Miabi never overwrites it, and says so on every converge.
It is validated with goma config check before the gateway is ever started — and before a
restart — so a typo fails in seconds with Goma's own line number rather than taking the gateway
down. That matters because the panel's own route lives in this file: break it and you would lock
yourself out of the UI you'd use to fix it.
After editing it, restart the gateway to apply it (Goma watches the providers directory, not its base config):
sudo miabi stack restart miabi-gateway
spec.gateway.env is the gateway's environment: GOMA_LOG_LEVEL and GOMA_ANALYTICS_ENABLED
(both seeded), plus anything your config interpolates. TZ is not here — it lives in
spec.server.env, applies to the whole stack and already reaches the gateway, so the whole stack's
log timestamps agree.
GOMA_ANALYTICS_ENABLED is seeded to true because Miabi's analytics consumer runs by default;
without the gateway emitting its event stream, every Workspace
Analytics dashboard would sit empty. Set it to "false" to turn the
stream off — it is a seeded default, not a managed variable, so your value stands.
spec:
  gateway:
    config: goma.yml
    env:
      MY_UPSTREAM: https://internal.example.com
  secrets:
    gomaConfigEncryptionKey: …
The gateway config key has exactly one home: spec.secrets.gomaConfigEncryptionKey (gateway.env
in the older flat manifest). Miabi encrypts the config that Goma decrypts, so it forwards the key to
both containers. spec.server.env refuses GOMA_CONFIG_ENCRYPTION_KEY — set on one side only,
routing would break with no obvious cause.
goma.ymlGoma watches /etc/goma/providers, where Miabi writes your apps' routes. Additional routes and
middlewares belong there — hot-reloaded, and untouched by upgrades — rather than in a forked base
config you then have to maintain.
endpoints.control is separate from endpoints.web because it does not have to equal it. A node on
a private network may reach the control plane at an internal address the public panel URL never
resolves to — welding the two together would force that traffic out over the internet and back.
Leave it unset and it follows endpoints.web, which is right for a single public hostname.
spec.server.env takes anything Miabi reads that the manifest does not already model — SMTP, OAuth,
HTTP_PROXY, and so on. Variables Miabi sets itself (the database password, the domain, the
encryption key, the registry) are refused there rather than merged, so a setting can never have
two disagreeing sources of truth. TZ applies to the whole stack, so every container's log
timestamps agree.
The document models more than the example above shows — the managed-network pool, the host-port range, the default cluster's external domain, platform backup, the license file and the ACME directory. Where the console also edits such a setting, stating it here locks the console's field. See Install Manifest for every field.
--no-host-proc
By default Miabi binds the host's /proc read-only, so the Nodes page can report real host CPU and
memory. Some hosts refuse that bind — a rootless daemon, a hardened host, a socket proxy that
forbids host binds. Pass --no-host-proc (or MIABI_NO_HOST_PROC=1) and Miabi reads its own
/proc instead, which inside a container already reflects host CPU and memory. Host metrics keep
working — this is a graceful fallback, not a feature you lose.
Install without the script
Don't want to pipe a script into bash? You don't have to. The script's only unique job is
installing Docker — everything after that is the miabi CLI, which you can install yourself.
Grab the binary for your platform from the
CLI releases (or brew install miabi-io/tap/miabi
on macOS), then:
sudo miabi setup --domain miabi.example.com --admin-email you@example.com
That's the whole install. It creates the two networks, the volumes, PostgreSQL, Redis, the gateway
and the control plane, writes /etc/miabi/miabi.yaml, and prints the admin password.
Two networks, because the platform does not sit on the same one your apps do: PostgreSQL, Redis and
the control plane live on a private miabi-internal bridge that only the gateway also joins. See
The platform's private network.
Drop --admin-email and Miabi falls back to admin@miabi.example.com.
Docker must already be installed — this path skips the installer script, and the script is what installs Docker for you.
setup is idempotent
Running it again is a converge, not a reinstall: it keeps the stored secrets (a regenerated database password would lock the control plane out of its own data) and recreates only what actually differs from the manifest. That is what makes "edit the manifest, re-run setup" the supported way to change anything.
Add --yes to skip the confirmation when scripting it. Without a terminal there is nobody to
answer, so --yes is not optional there.
Which image it installs
setup installs miabi/miabi at the latest published Miabi release, looked up when it runs —
the version is not baked into the CLI. That decoupling is deliberate: the CLI releases on its own
cadence, so a CLI built months ago still installs today's Miabi, and miabi stack status shows both.
The lookup reads the stable release from versions.miabi.io, falling back
to GitHub's releases API (or a MIABI_RELEASE_API mirror instead of both). A security release is
called out when it is picked. If neither can be reached, setup warns and falls back to
miabi/miabi:latest, which costs you automatic rollback and drift detection.
To pin a release, pass --version 1.8.0. To install something else, including from a private
registry, pass the image verbatim:
sudo miabi setup --domain miabi.example.com --image registry.example.com/miabi:1.7.3
Everything else is the same binary
sudo miabi stack status
sudo miabi upgrade                # rolls the control plane forward, rolling back if it fails
sudo miabi stack uninstall        # keeps your data; add --volumes to destroy it
Install with docker run — no binary at all
The Miabi image is also an installer, and that path is fully supported. It is the right one when
you'd rather not put a binary in /usr/local/bin — notably when you don't have root:
docker run --rm -it \
  -v /var/run/docker.sock:/var/run/docker.sock \
  -v /etc/miabi:/etc/miabi \
  miabi/miabi:1.7.3 install --domain miabi.example.com --admin-email you@example.com
install, upgrade, restart, status and uninstall all run this way. They are the same
commands as miabi setup / miabi upgrade / miabi stack … — one implementation, two front-ends —
so neither path can drift from the other, flags included:
# alias it once and the day-two commands are short
alias miabi-host='docker run --rm -it \
  -v /var/run/docker.sock:/var/run/docker.sock \
  -v /etc/miabi:/etc/miabi miabi/miabi:1.7.3'

miabi-host status
miabi-host upgrade --version 1.8.0    # or --image <ref> for a private registry
miabi-host restart miabi-gateway
miabi-host uninstall                  # keeps your data; add --volumes to destroy it
update is now upgradeThe image's verb was renamed to match the CLI. update still works and does the same thing, after
printing a deprecation notice; it will be removed in a future release.
Two things this path does better:
- The tag you invoke is the tag you get. The image asks Docker for its own reference, so
miabi/miabi:1.7.3 installlands exactly 1.7.3, private registry included, with no inference. The CLI has no container to inspect and looks up the latest release instead. - No root required. See Running the installer container as non-root below — uid 10001 plus the host's docker group is enough.
-v /etc/miabi:/etc/miabi is not optional: without it the manifest and the gateway config are
written inside the throwaway container and lost when it exits, so Miabi refuses to install rather
than let that happen.
Running the installer container as non-root
The command above runs the installer container as root — the simplest thing that works, and the
same privilege level as the sudo on the one-line script. If you'd rather not, the image ships a
non-root miabi account (uid/gid 10001); run as it by adding two flags:
docker run --rm -it \
  --user 10001:10001 \
  --group-add "$(stat -c '%g' /var/run/docker.sock)" \
  -v /var/run/docker.sock:/var/run/docker.sock \
  -v /etc/miabi:/etc/miabi \
  miabi/miabi:1.7.3 install --domain miabi.example.com --admin-email you@example.com
--user 10001:10001runs as the image's non-root account instead of root.--group-add "$(stat -c '%g' /var/run/docker.sock)"adds the host's docker group — the group that owns/var/run/docker.sock. Without it a non-root user cannot read the socket and the install fails at once with a permission error. It is the same reason the Compose path keepsgroup_add.
/etc/miabi must be writable by uid 10001Unlike the Compose path — where a fresh named volume inherits 10001:10001 from the image — a
docker run bind-mounts a host directory, whose ownership Docker does not change. Create it
owned by the non-root account first, or the installer cannot write the manifest:
sudo install -d -o 10001 -g 10001 /etc/miabi
This is the docker run equivalent of the Compose Running unprivileged
section: both run as uid/gid 10001 and grant the host's Docker GID.
Manual install with Docker Compose
Prefer to skip the installer script? You can bring up the identical stack by hand with plain Docker Compose — nothing about Miabi requires the one-line installer, and this path runs equally well on a host that already has other containers on it.
git clone https://github.com/miabi-io/miabi && cd miabi/examples/compose
cp .env.example .env
# Optional but recommended: pre-create the shared app network with a roomy CIDR so
# it isn't capped by Docker's small default pool. Compose creates it for you
# otherwise. See Networks & Subnets.
docker network create --driver bridge --subnet 10.63.0.0/16 miabi-proxy || true
docker compose up -d
docker compose logs -f miabi
The stack comes up on two networks: miabi-proxy, shared with every app you expose with a route, and
miabi-internal, private to PostgreSQL, Redis and the control plane. Only the gateway is on both.
Compose creates the private one for you, and .env.example already sets the matching
MIABI_INTERNAL_NETWORK. See
The platform's private network.
Fill these in .env before the first docker compose up:
| Variable | How to produce it | If it is missing |
|---|---|---|
MIABI_DB_PASSWORD | openssl rand -hex 32 | Compose aborts with set MIABI_DB_PASSWORD |
MIABI_REDIS_PASSWORD | openssl rand -hex 32 | Compose aborts |
MIABI_DOMAIN | Your panel host, e.g. miabi.example.com | Compose aborts |
MIABI_JWT_SECRET | openssl rand -hex 32 | Miabi refuses to boot outside dev |
MIABI_ENCRYPTION_KEY | openssl rand -hex 32 | Miabi refuses to boot outside dev |
MIABI_ADMIN_PASSWORD | The platform admin's password | Read only on first boot, to seed the admin: outside dev, Miabi refuses to start on an empty or default value while no admin exists |
MIABI_WEB_URL | https://<MIABI_DOMAIN> | It is also the default CORS allowlist: unset (and no MIABI_CORS_ORIGINS), the allowlist becomes * and Miabi refuses to boot outside dev |
Also set DOCKER_GID to the host's docker group id (stat -c '%g' /var/run/docker.sock). It is not
required — it defaults to 999 — but a mismatch means the container cannot read the Docker socket.
The one-line installer generates all of these for you; this path is for operators who want to see every value.
goma.yml interpolates MIABI_DOMAIN and MIABI_ACME_EMAIL from the environment, so a single
.env drives the whole stack — no separate gateway edit.
The Miabi container mounts the Docker socket to manage app and database containers, and shares the
goma-providers volume with Goma so route files are hot-reloaded.
The examples/compose/ stack turns
on the built-in registry, one-click wildcard app URLs, an externalized log volume, and an optional
scaled-out worker — plus a Traefik variant. It is the only Compose stack Miabi ships.
Mounting the Docker socket is equivalent to root on the host. Run Miabi on a dedicated host or VM and restrict who can reach the admin API. See Security.
Running unprivileged
By default the Miabi container runs as root so it works out of the box — reading the Docker
socket, binding any port, and writing bind-mounted directories. The image also ships a non-root
miabi account (uid/gid 10001) whose data directories are pre-owned, so you can opt into
unprivileged mode by adding one line to the miabi service and keeping group_add for the host's
Docker GID:
    user: "10001:10001"
    group_add:
      - "${DOCKER_GID:-999}"   # gid of the host's docker group
A fresh named volume inherits 10001:10001 from the image, so there's no chown dance. For a
purpose-built rootless image, use the rootless variant (docker/Dockerfile.rootless).
First run
Open your domain in a browser and sign in as the platform admin, seeded into the database on
first boot. The installer generates the password, prints it once at the end of the run, and stores
it in /etc/miabi/miabi.yaml — which is the only copy, so back that file up. Change the password
from the UI after your first sign-in.
The login is admin_email from the manifest — the address you installed with. If you gave only an
ACME contact, that is the login; if you gave neither, it is admin@<domain> (see Install
options).
There is no "first account to register becomes admin" behaviour — Miabi refuses to start outside dev while the admin password is empty or left at its built-in default.
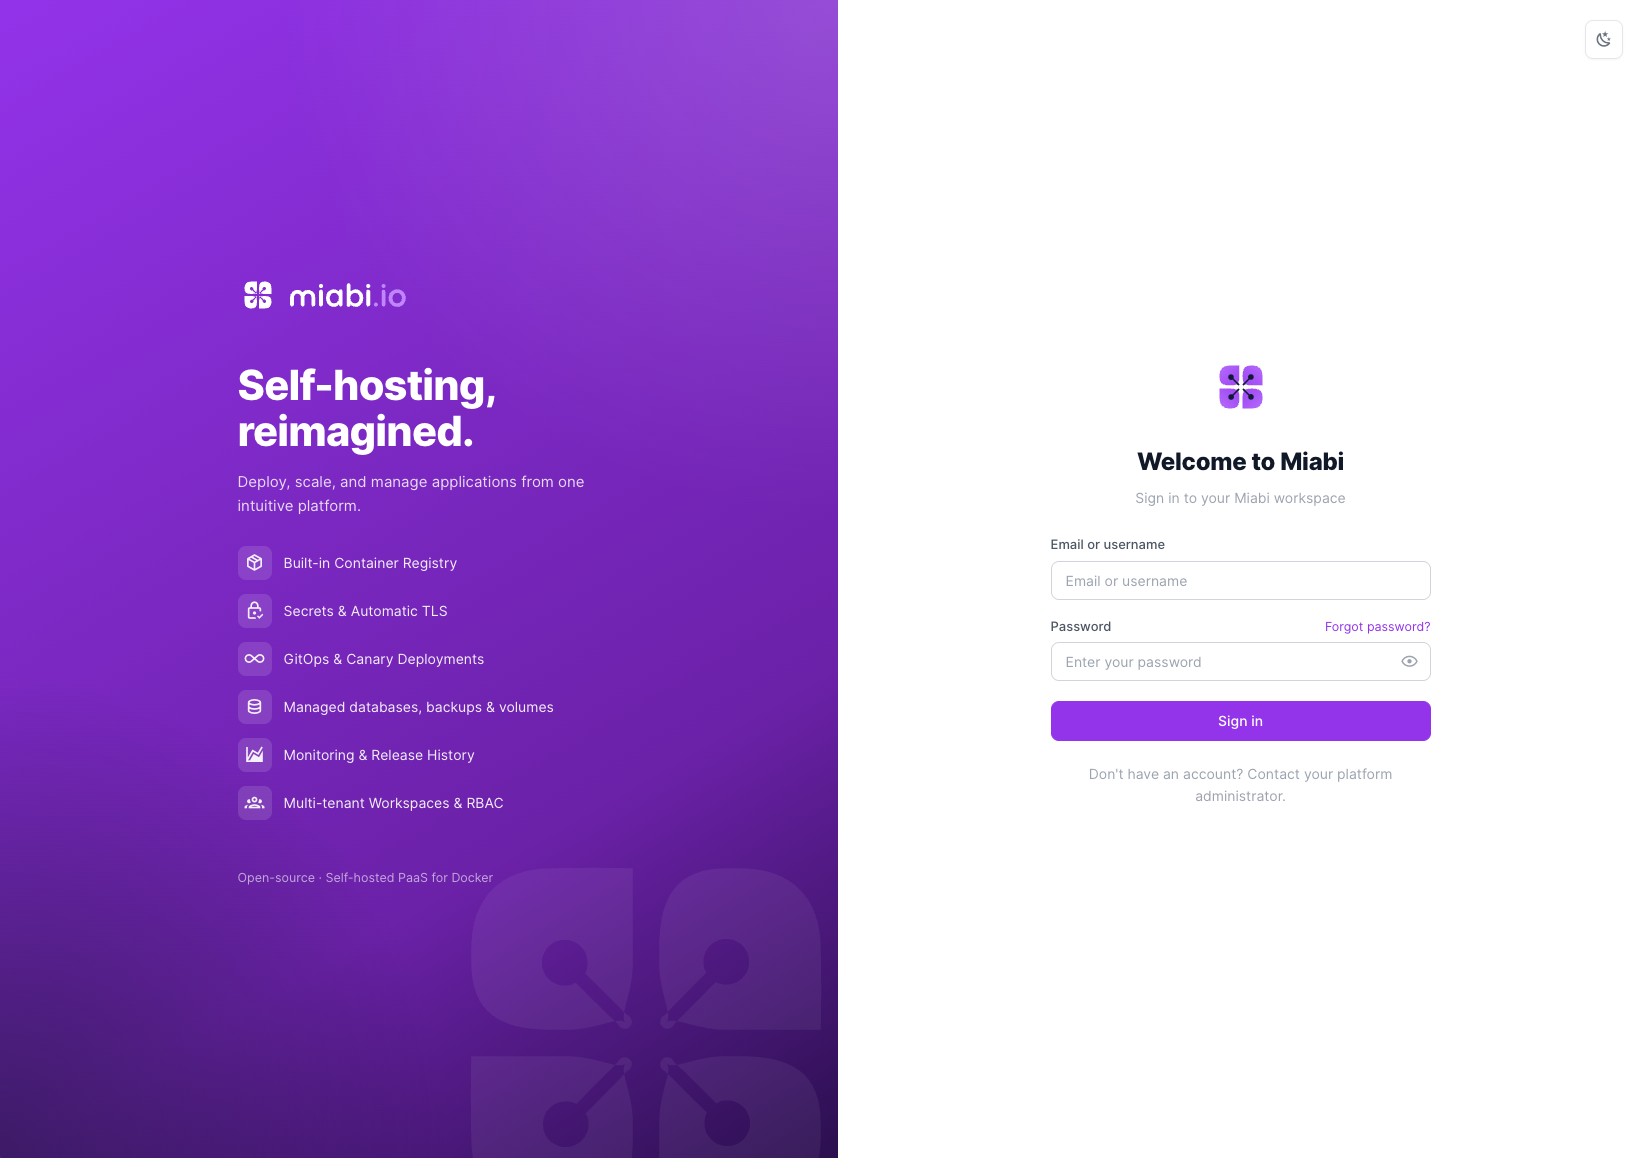
From there:
- Create a workspace.
- Deploy an application.
- Attach a domain and get automatic SSL.
- Provision a database and back it up.
See the Quick Start for a guided walkthrough.
Verifying the deployment
Once running, the control plane exposes health endpoints:
# Liveness
curl https://your-domain/healthz

# Readiness (checks DB + Redis)
curl https://your-domain/readyz
The interactive API reference is served at https://your-domain/docs.