Using Templates
Templates turn popular software into a one-click install. This page walks through installing a template, configuring it for your environment, keeping it up to date, and removing it.
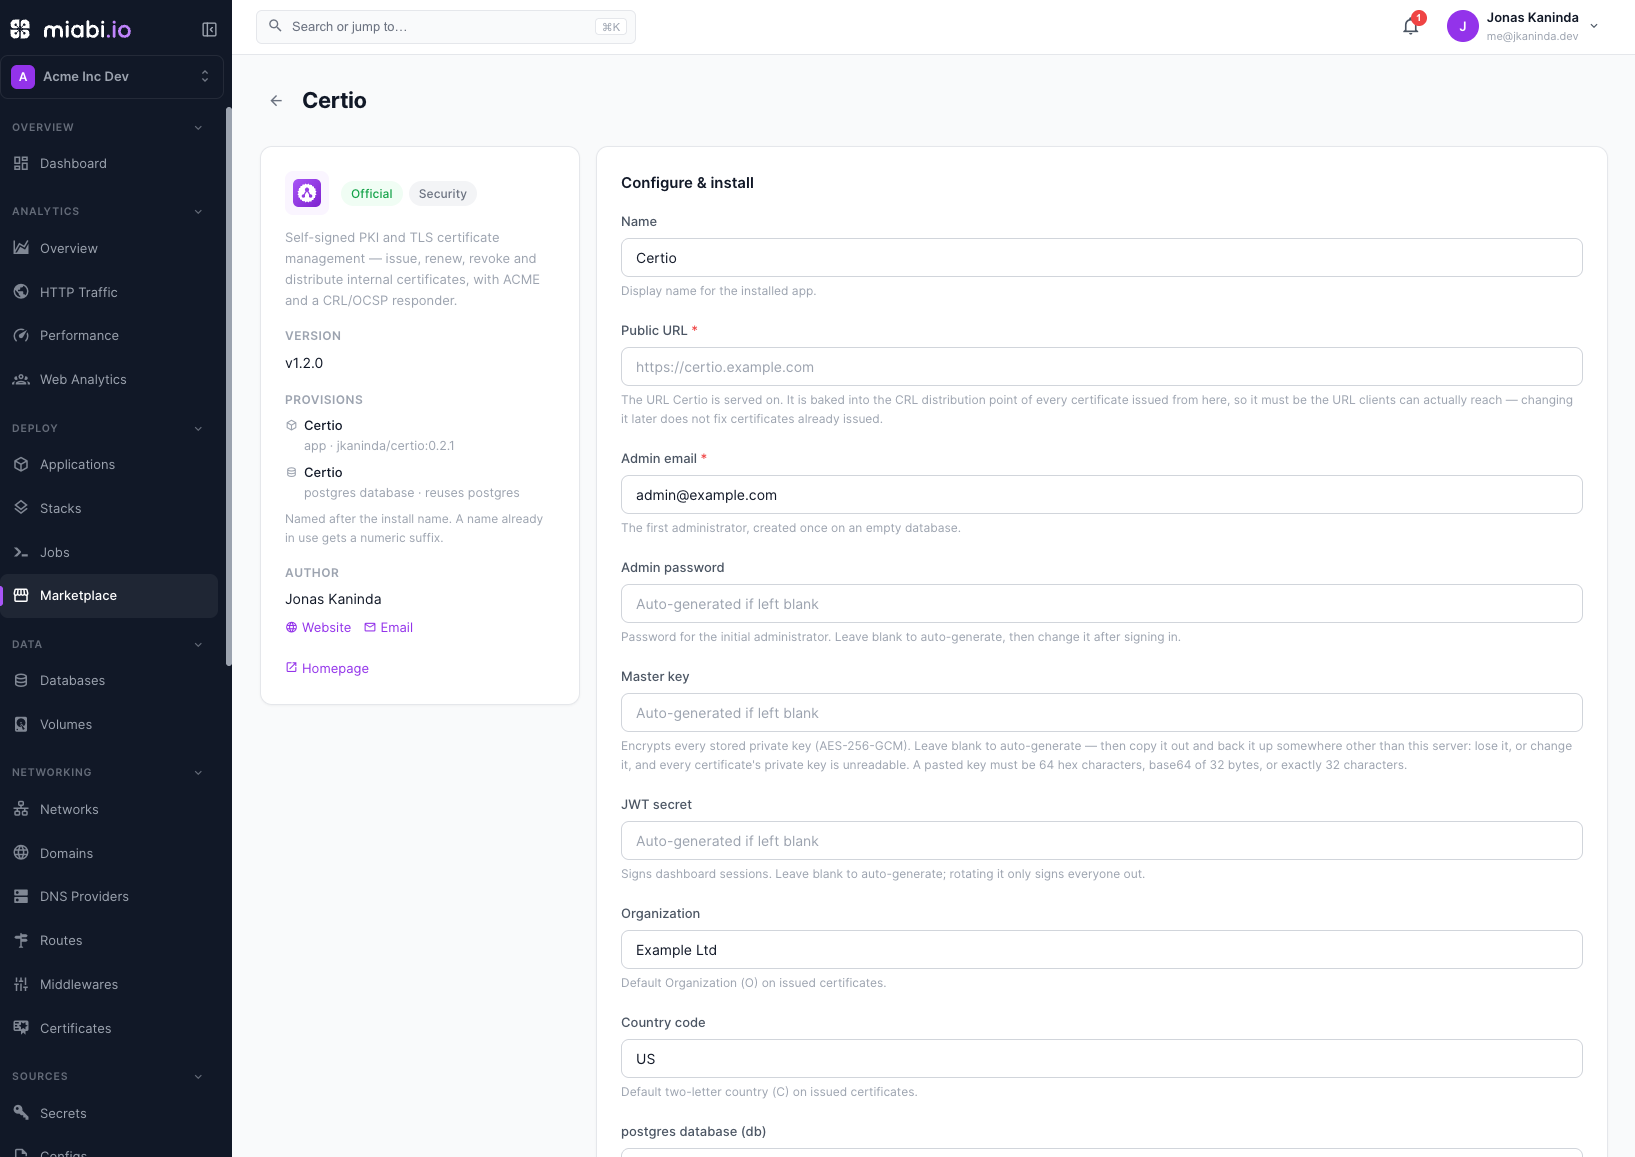
Installing a template
- Open your workspace and go to Deploy → Marketplace.
- Browse or search the catalog (tabs All, Official, Community, Custom) and select a template.
- Review the template details and the version you're installing.
- Under Configure & install, fill in the form:
- Name — the display name for the installed app(s). Everything the install creates (apps, stack, volumes, configs) is named after it.
- The template's inputs. Password inputs marked as generated can be left blank to get a random value.
- Location — shown when the workspace can deploy to more than one location. The install's databases stay in the same location, since private networks don't span locations.
- One placement per database the template declares: Automatic (reuse or create), New dedicated instance, or an existing instance of that engine in the chosen location. Redis always gets a dedicated instance.
- Select Install…, confirm, and follow the progress as Miabi provisions the databases, creates volumes and configs, and deploys the apps.
The install creates standard Miabi resources: an application per app in the template, grouped into a stack when there is more than one. From here on you manage them like anything else in the workspace.
Configuring the app
Templates ship with sensible defaults, but you'll usually customize a few things after install:
Environment variables
Values from the install form, and the connection details of the databases the install provisioned, land in the app's environment. Values the template marks secret are stored encrypted. Review the defaults and override what you need.
Domain and SSL
Attach a custom domain to make the app reachable, and Miabi handles SSL automatically. Add the domain in the application's Domains section after install.
Resources
Set CPU and memory limits to match the workload. You can adjust resource limits and scale the app at any time from its settings.
Upgrading to a newer template version
Because templates are versioned, upgrades are deliberate:
- Go to Marketplace → Installed. An install with a newer version shows a vX available badge.
- Select Upgrade. It opens the template page with the upgrade plan: what changes between your version and the new one, including new volumes and configs, and any New settings to provide.
- Fill in the new settings and select Upgrade to vX.
An upgrade moves each app to the new image, adds new environment variables, creates new volumes and configs and mounts them, then redeploys. It does not overwrite environment values you already have, and changes it can't apply safely are reported as warnings instead: changed or removed variables, new databases (add those manually), and structural changes to an app.
An app installed from a template shows that it is managed by the template. Changing its image by hand means it no longer matches, and a later upgrade may overwrite your change, so prefer Upgrade via Marketplace.
Treat a template upgrade like any deploy: take a backup of the app's databases and volumes first, then upgrade. If anything goes wrong you can roll back the deployment.
Uninstalling
Marketplace → Installed → Uninstall (workspace admins) removes everything the install created: its apps and stack, the logical databases its apps use, the database instances it provisioned, and its configs and volumes. It is best-effort, so it carries on past individual failures and lists what was removed and what wasn't. You confirm by typing the install's name.
Uninstalling deletes the install's volumes and dedicated database instances along with their data. Back up anything you need first.