Exposing an Application
A freshly deployed app runs on a private workspace network. Nothing reaches it from the outside until you say so. This page covers the three ways to change that, and how to pick between them.
First: declare a container port
Every method below needs Miabi to know which port your container listens on. This is the single most common reason an app looks deployed but answers nothing.
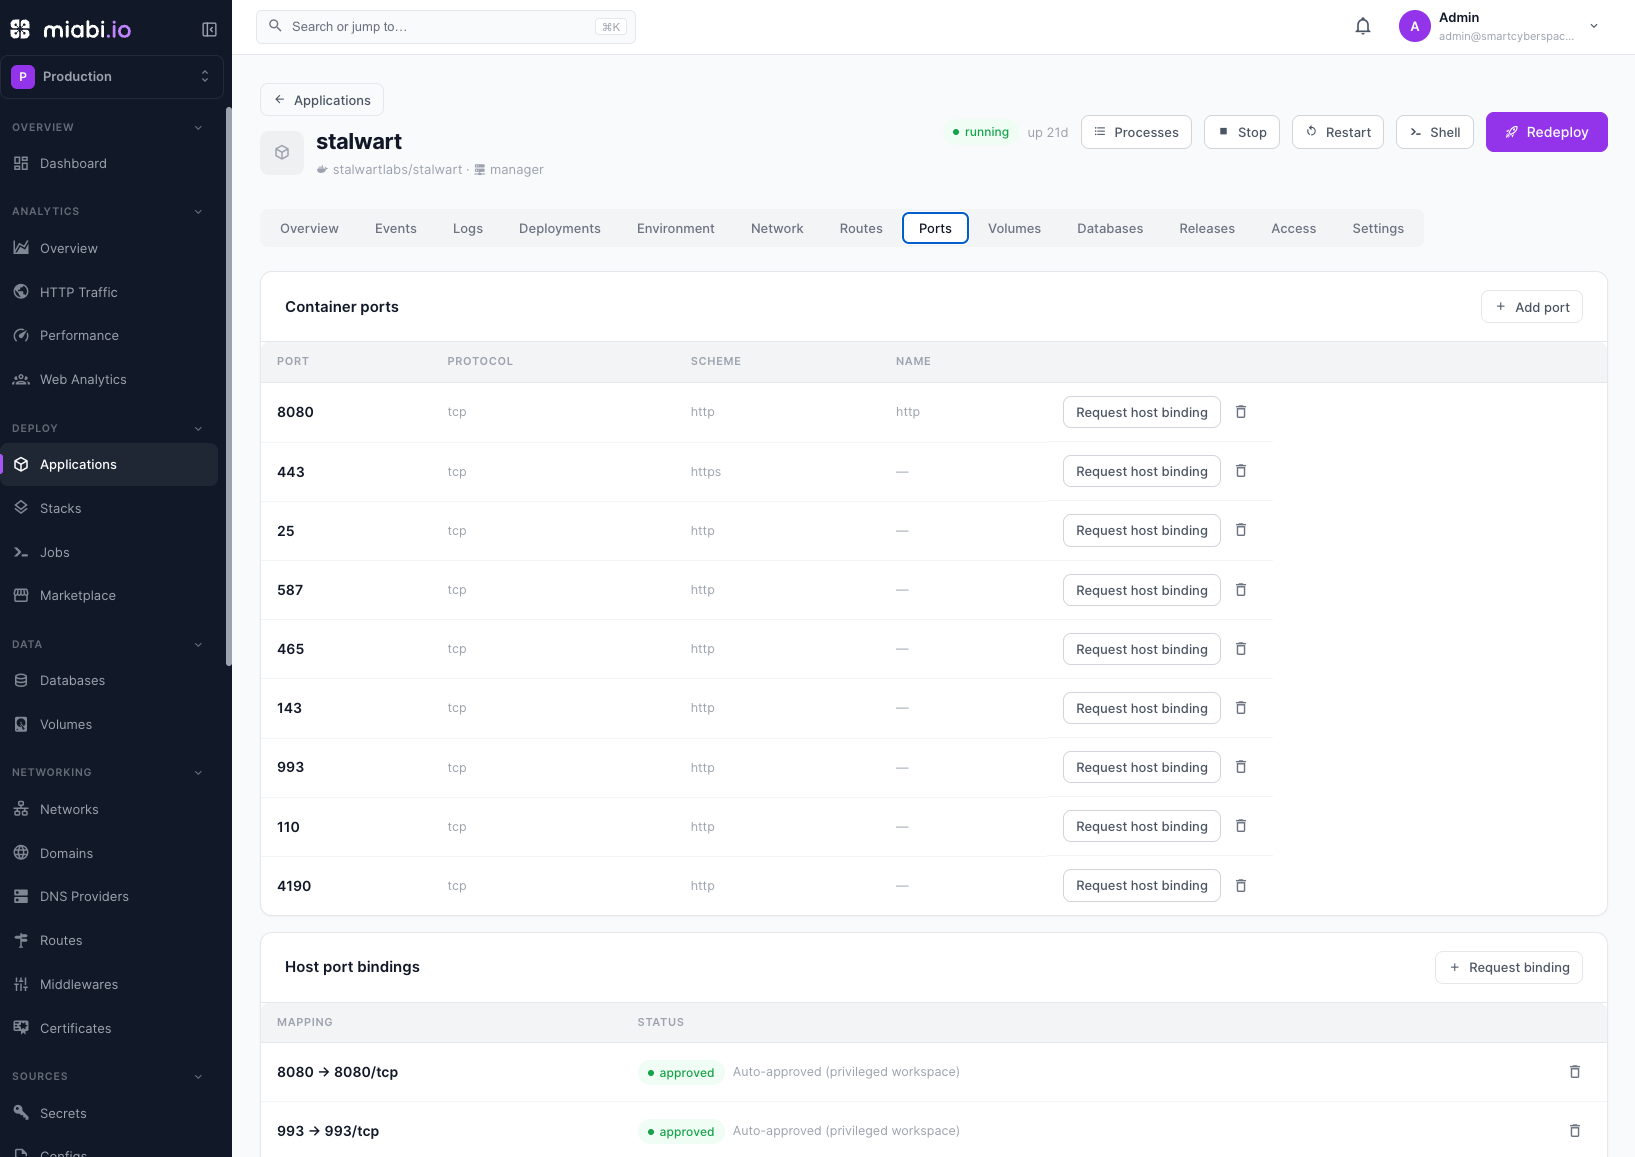
Open the app → Ports → Container ports → Add port (or Settings → Configuration →
Container ports) and add the port your process binds inside the container — 3000 for a typical
Node app, 8080 for many Java services, 80 for nginx.
| Field | What it means |
|---|---|
| Container port | The port your process listens on inside the container. Not a host port. |
| Protocol | tcp or udp. HTTP is always tcp. |
| Scheme | http or https — what your app speaks on that port. Miabi builds the gateway's backend URL from it. Set https only if your container terminates TLS itself, which is unusual. |
| Name | Optional label, useful when an app exposes several ports (web, metrics, grpc). |
If your app reads a PORT environment variable, set it in
Environment variables and declare the same
number here. The two must agree.
Choosing how to expose it
| Method | Public URL | Needs | Best for |
|---|---|---|---|
| External access | <label>.<base-domain> (generated) | An admin has set an external domain on the app's cluster | Getting a working HTTPS URL in one click — previews, internal tools, demos |
| Custom domain | Whatever you own | A verified domain | Anything you want people to type or bookmark |
| Host port | node-ip:port | Platform-admin approval | Non-HTTP protocols, or a service that cannot sit behind the gateway |
The first two go through Goma Gateway, which means automatic TLS, middlewares, and no ports open on the host. Prefer them. The third publishes a port on the node itself and bypasses all of that.
Method 1 — One-click external access
The fastest path to a working HTTPS URL. Miabi generates a hostname under the wildcard domain of the cluster the app runs in, and creates the route and certificate for you.
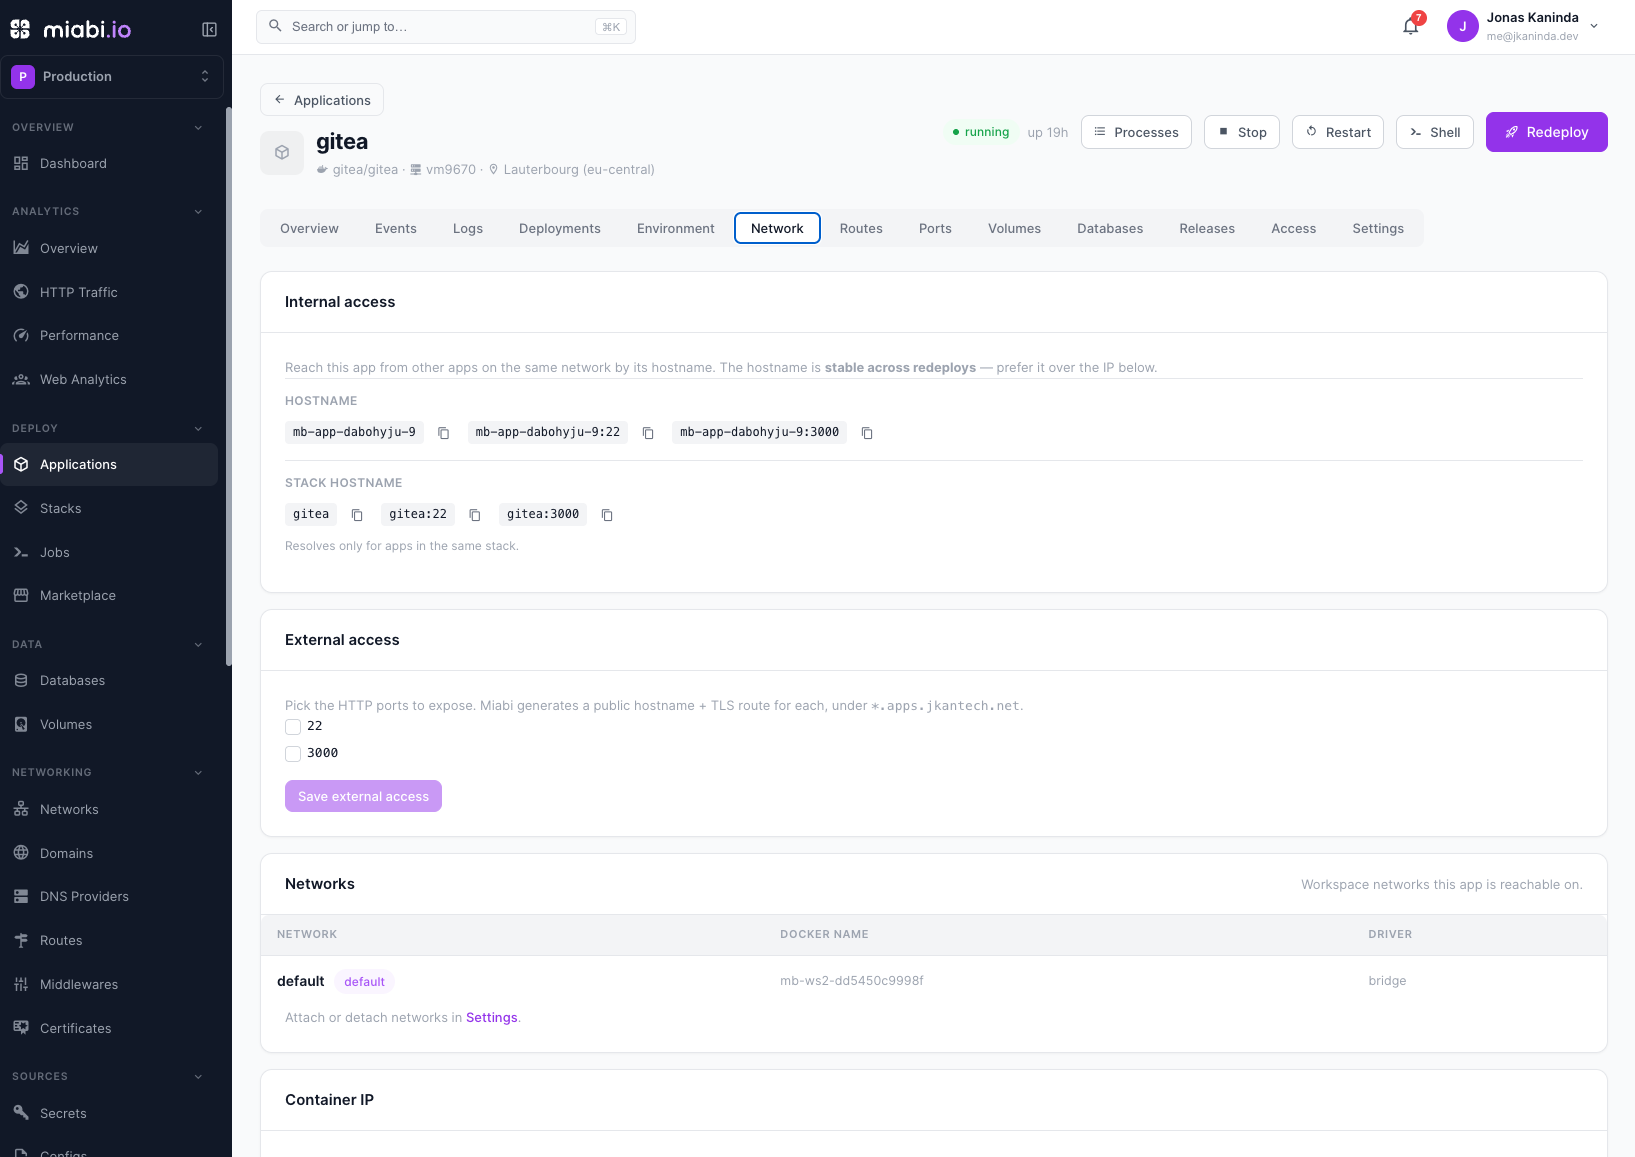
Application → Network → External access. Tick the HTTP ports you want reachable and press Save external access.
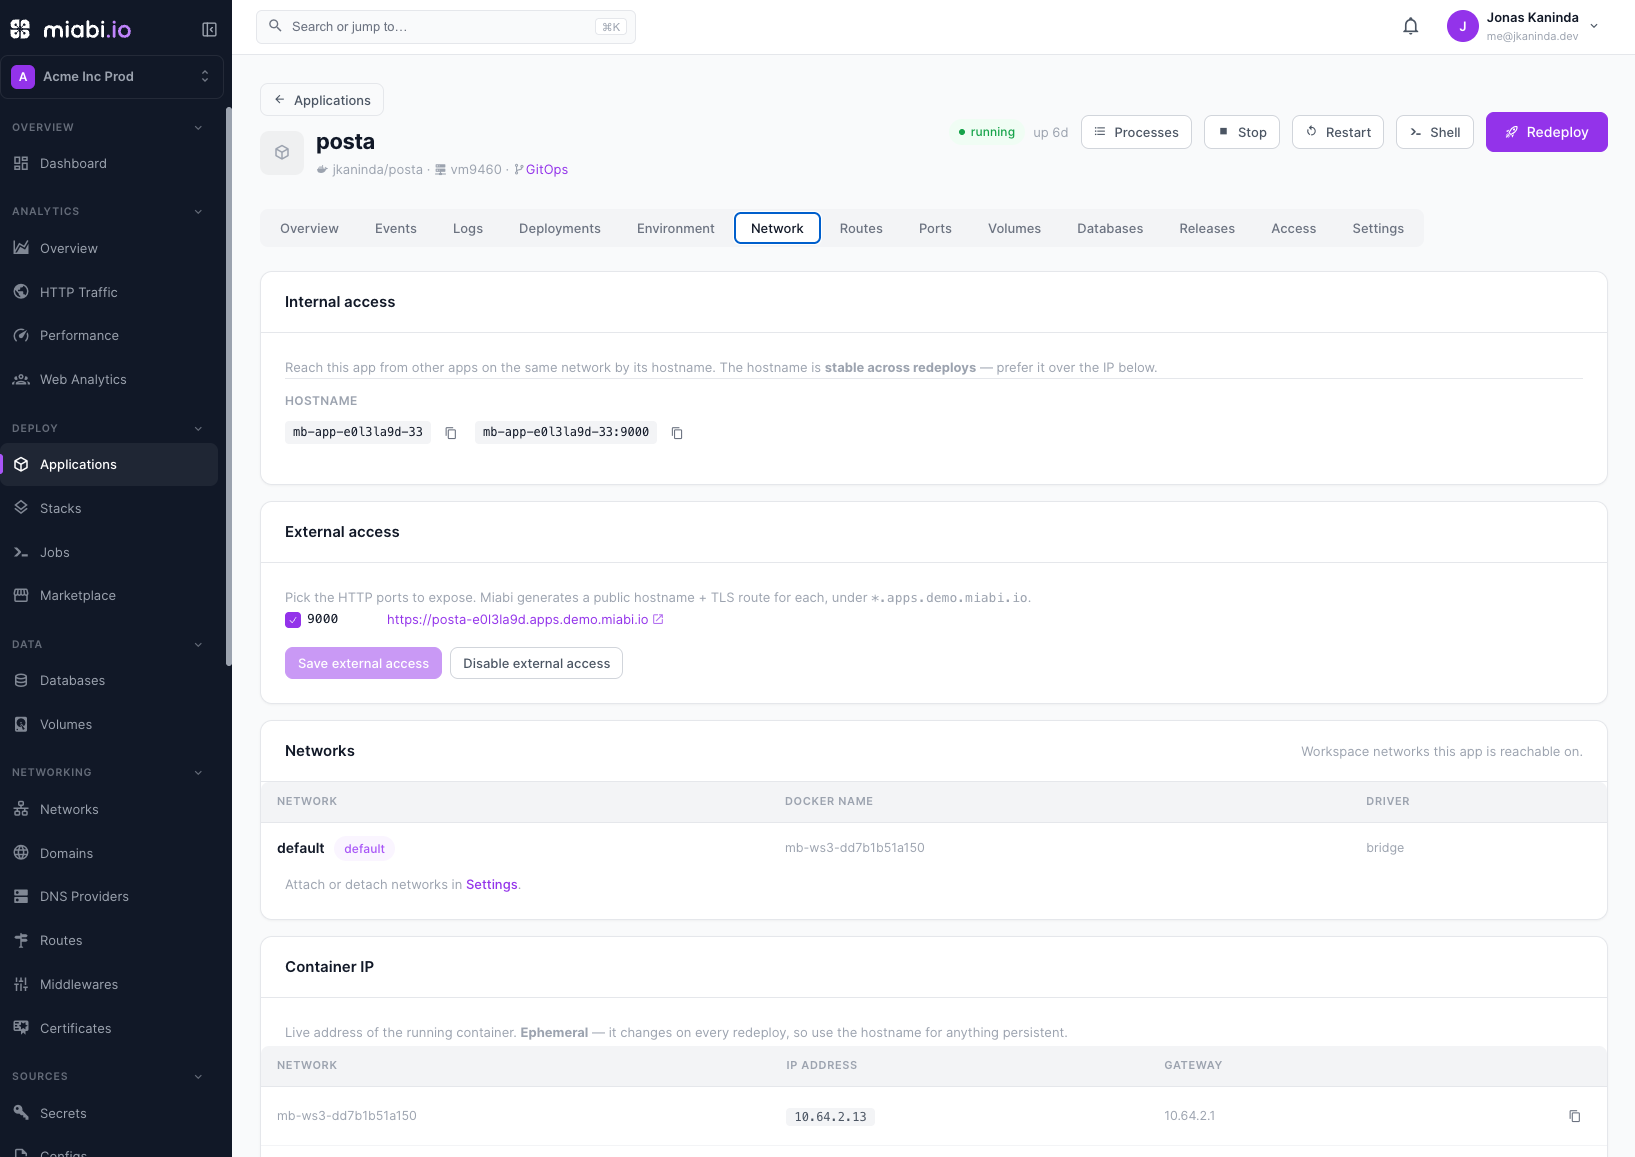
Each ticked port gets its own public hostname and a TLS route, generated under
*.<base-domain>.
The label is stable
The generated hostname is <label>.<base-domain>, where the label defaults to
<app-handle>-<token>. It is generated once and then pinned to the app, so the URL
survives renames and redeploys — a link you shared last month keeps working after you
rename the app.
If the card says it is unavailable
External access needs an external domain on the app's cluster. Each cluster has its own, set by a platform admin under Clusters → Edit. In a location without one the card explains that and offers nothing to tick. See Cluster mode.
Turning it off
Disable external access removes the generated routes and the app stops answering on those hostnames. The label is kept, so re-enabling later gives you the same URL back.
When the domain changes
If an admin changes the cluster's external domain, every generated URL in that cluster moves
to the new domain with the same label: <label>.<old-domain> becomes <label>.<new-domain>,
and the old hostname stops answering. Clearing the domain removes the generated routes.
Custom domains are not affected.
Method 2 — Your own domain
Use this for anything real. It is a two-step flow: prove you own the domain, then point a route at your app.
Step 1 — Verify the domain
Add the domain under Networking → Domains and prove ownership by publishing the
challenge TXT record, or by connecting a
DNS provider so Miabi publishes it for you. Full detail
in Domains.
A domain must be verified before a route on it will serve traffic — an unverified domain leaves its routes offline with a plain reason on the route.
Step 2 — Point DNS at the gateway
Create an A/AAAA record for the hostname pointing at the node running the gateway
(or a CNAME to it). Ownership verification proves the domain is yours; this is what
makes browsers actually arrive.
Step 3 — Create the route
Open the app → Routes → Add route.
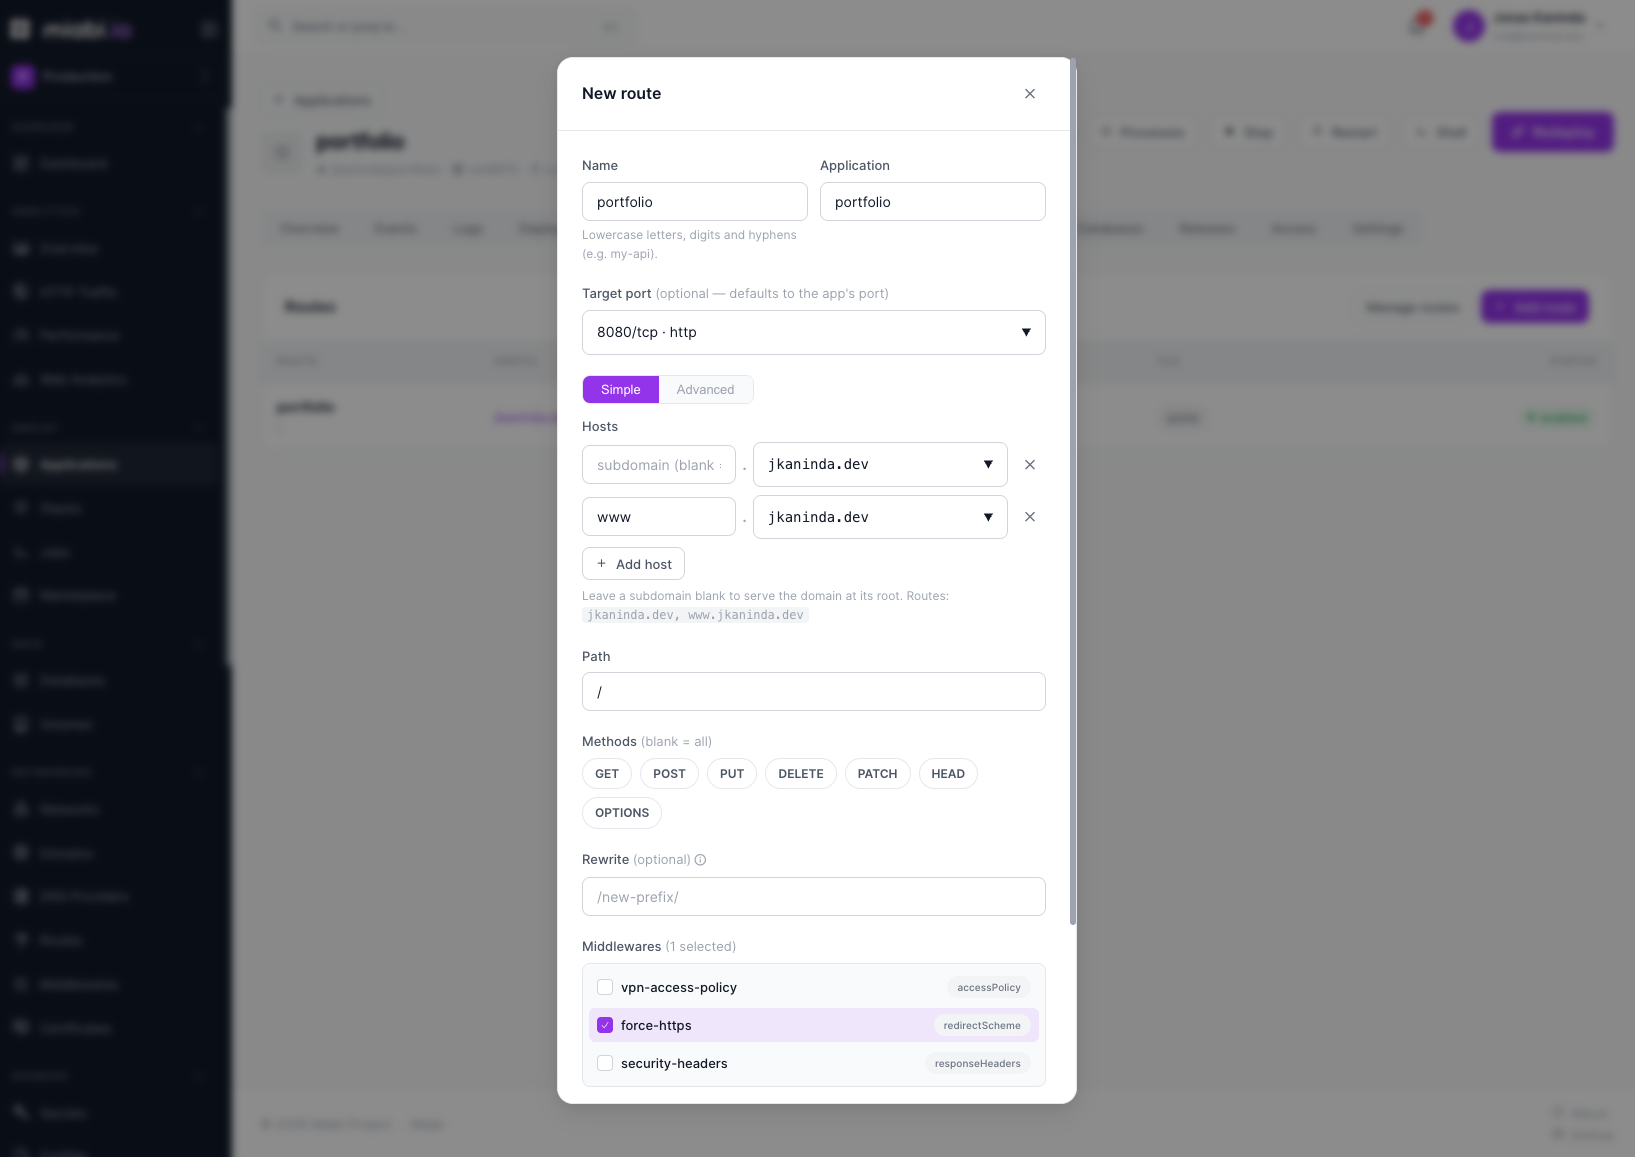
| Field | Notes |
|---|---|
| Hosts | The hostnames this route answers, e.g. app.example.com. Each must resolve under a verified domain. |
| Path | Optional prefix. Leave blank for the whole host; use /api to route one path to this app and another elsewhere. |
| Target port | Which of the app's declared container ports receives the traffic. |
| TLS mode | acme for an automatic Let's Encrypt certificate (the usual choice), custom to use a certificate you uploaded, or none for plain HTTP. |
| Methods | Optionally restrict to specific HTTP methods. |
| Middlewares | Auth, rate limits, headers, geo rules — attached here and applied in order. |
Save, and the gateway picks the route up within seconds. The route list shows its sync status; live means the gateway is serving it.
Serving several apps on one domain
Give each app a route on the same host with a different path — / to the frontend,
/api to the backend. Routes are matched most-specific-first, so the order you create
them in does not matter.
Method 3 — A published host port
Sometimes the gateway is the wrong tool: a game server on UDP, a TCP database you must reach directly, a protocol Goma does not speak. For those, publish a host port.
Open the app → Ports → Host port bindings → Request binding, choose the container port and the host port you want (Suggest picks one that is currently free).
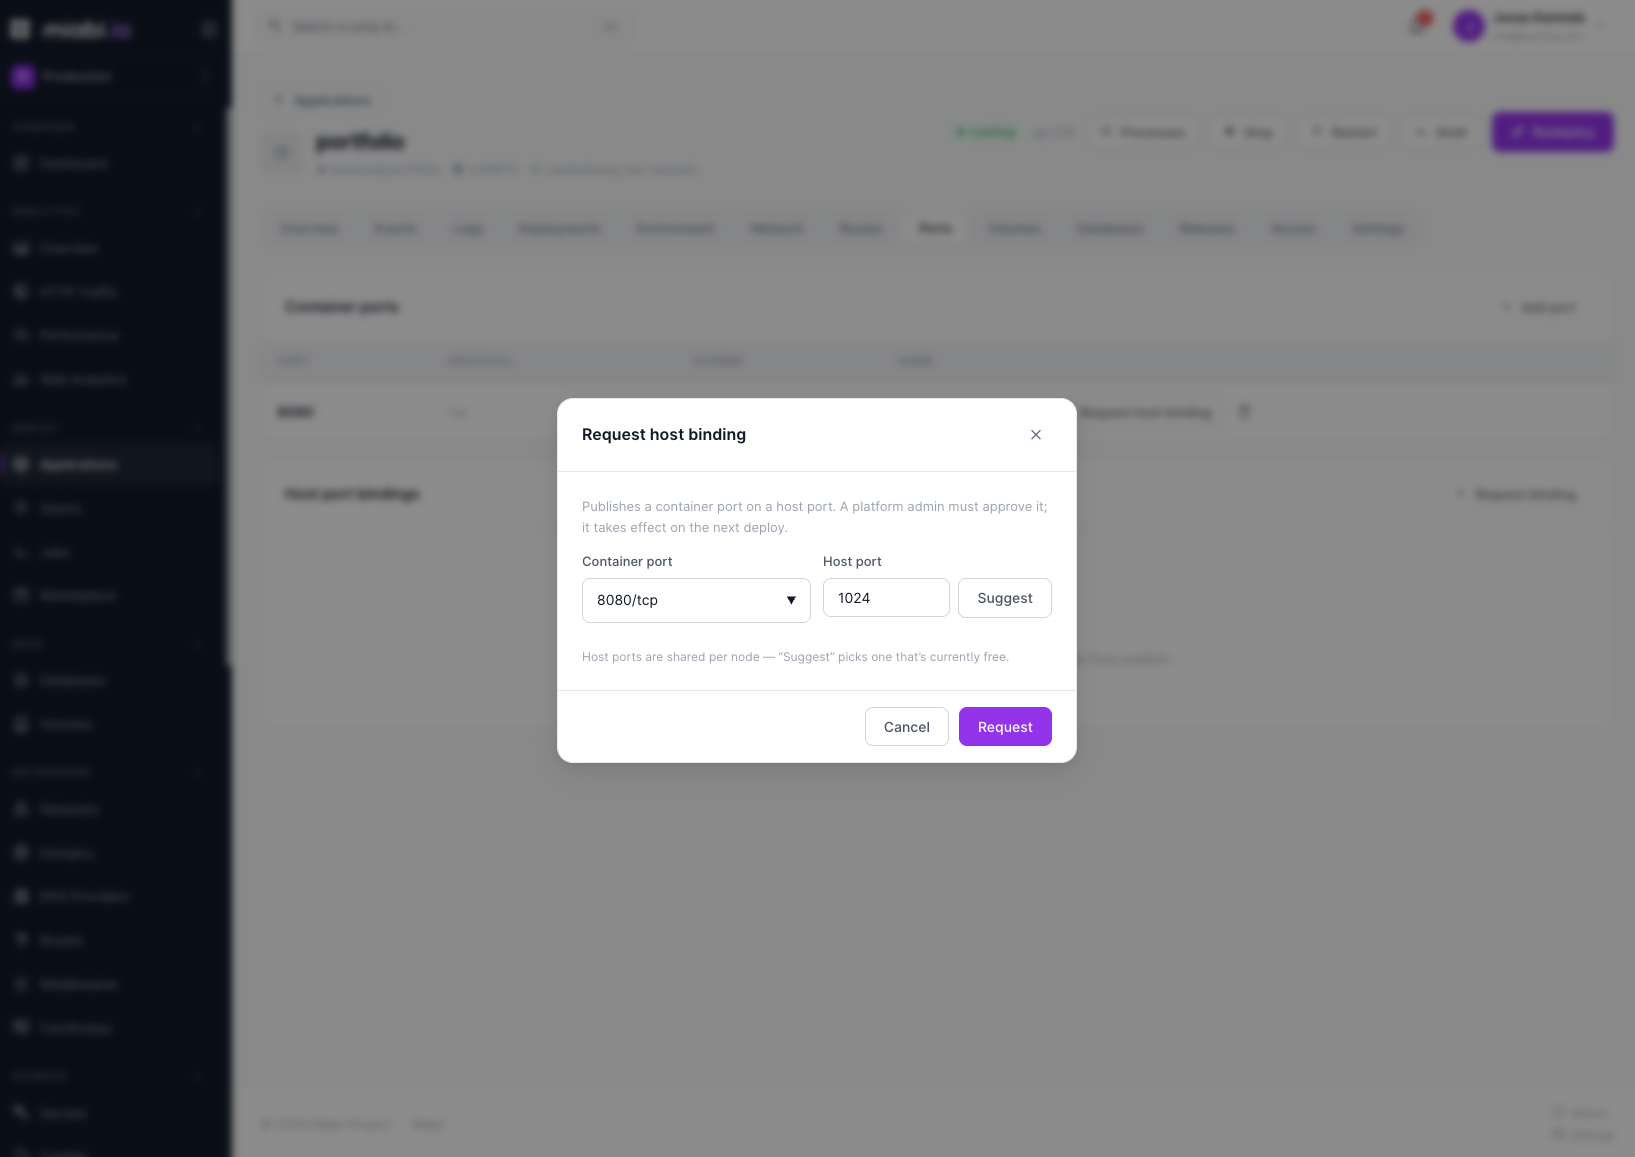
It goes through review
Host ports are a node-wide shared resource — two apps cannot both own :8080 on the
same machine. So a request enters a review queue and a platform admin approves it
before anything is published. Admins review these under Platform admin → Infrastructure →
Ports — see Moderating host ports.
Requests are bounded by MIABI_HOST_PORT_MIN / MIABI_HOST_PORT_MAX (default 1024
and above), so an ordinary workspace cannot ask for a privileged port.
A privileged workspace skips the queue and auto-approves, and may ask for any port from 1 to 65535 — but still only when the port is genuinely free on that node; a collision is refused with the current owner named.
It publishes on the next deploy
An approved binding is not live until the app is deployed again — publishing a port means recreating the container. Miabi flags the app as needing a redeploy when the approval lands.
A published port is open on the node's network interface, with no TLS termination, no middlewares, and no gateway logging. Everything Miabi gives you at the gateway is your responsibility here.
Checking your work
If the URL does not answer, work down this list — it is roughly the order things go wrong:
| Symptom | Likely cause |
|---|---|
| Route shows offline | The domain is not verified, or is banned. The route's status reason says which. |
| Route is live, browser times out | DNS does not point at the gateway node, or a firewall blocks 80/443. |
| 502 / bad gateway | The container is not listening on the declared port, or crashed. Check Logs. |
| 404 from the gateway | The Host header does not match any route host, or the path prefix does not match. |
| Certificate warning | ACME has not completed. It needs port 80 reachable for the HTTP-01 challenge — see TLS certificates. |
| Everything looks right, nothing responds | No container port declared. Start at the top of this page. |
The app's timeline records route and deploy events, which is usually the quickest way to see what changed.
Where to go next
- Routing & Middlewares — what the gateway does with a route once it exists, and how to shape requests.
- Domains — ownership verification in depth.
- TLS certificates — ACME, wildcard, and uploaded certificates.
- Canary deployments — shifting traffic between releases on a route you have already exposed.